Playing Minecraft with a gamepad, a tutorial for Enjoy2
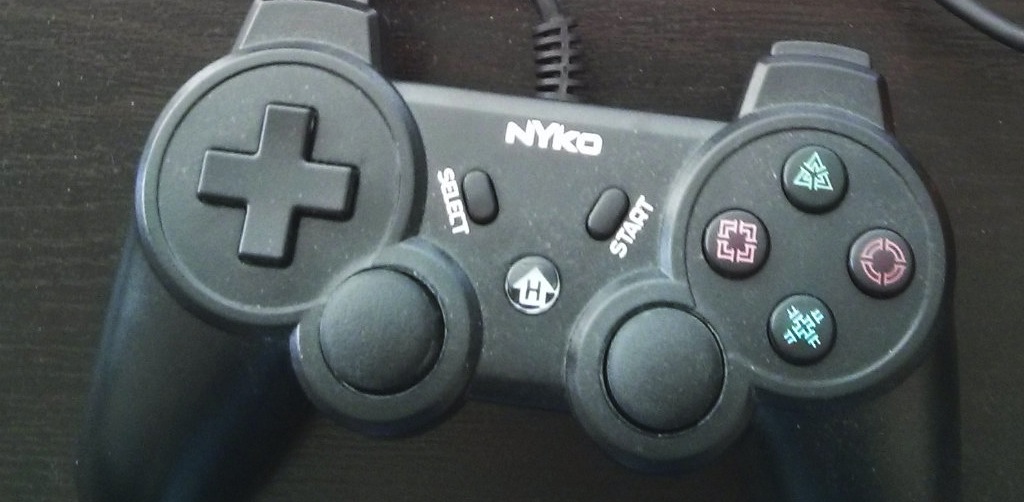
I like playing Minecraft, but after playing it for a couple of hours on a small 11-inch laptop, my wrists will start to hurt. I wanted to play Minecraft using a gamepad, like any console FPS, so I updated an open-source project to support mouse emulation and released Enjoy2. I'm not very experienced with OSX programming, though, so the user interface isn't as clear as it could be: the next version of Enjoy2 should hopefully make things a lot easier to use. In the meantime, here's a tutorial on how I set up Enjoy2 to control Minecraft with my aftermarket PS3 controller. (I don't own a PS3: I bought the controller specifically for PC gaming!) Download Enjoy2 here and try it yourself:
Left analog stick
The analog sticks are probably the weirdest part of the setup, so let's do that first. I like to have the left stick mapped to WASD and the right stick mapped to camera movement. With a controller plugged in, you should see something like this:
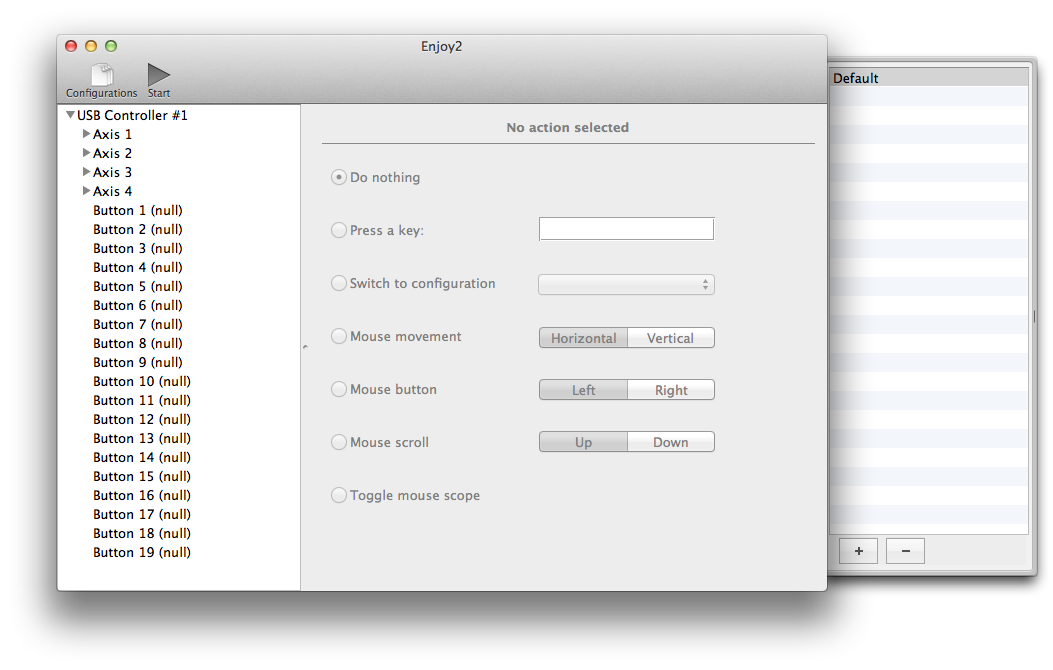
The various buttons and sticks show up on the left, and what actions they map to show up on the right. On the very right side is a list of configurations, allowing you to set up different mappings for your different games. Move the left analog stick in a circle. Hopefully, you'll see two of the "Axis N" entries open up, like so:
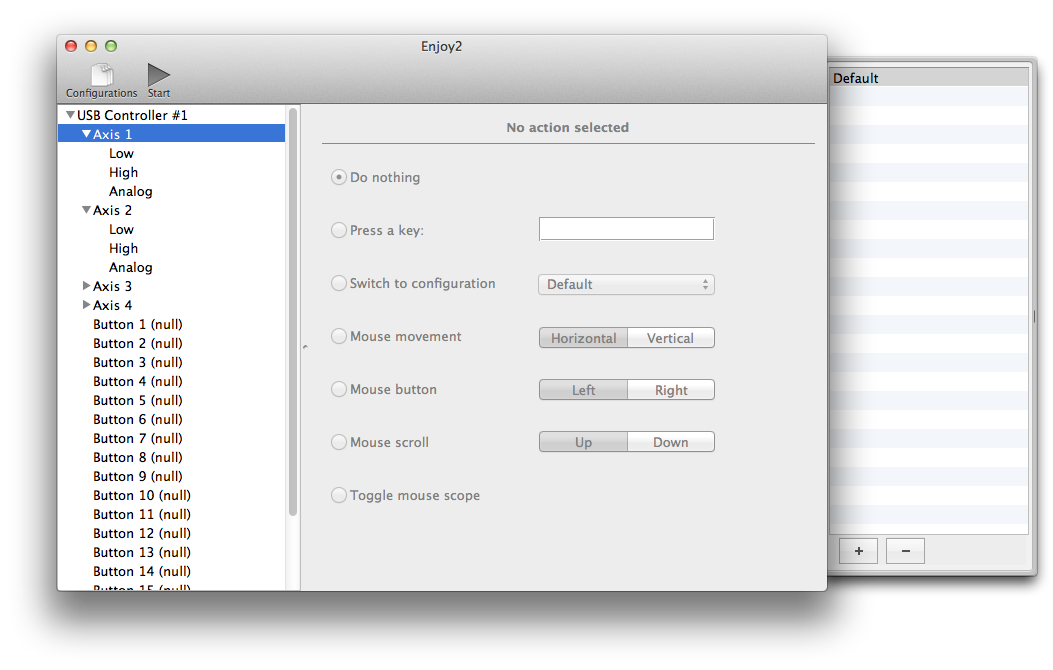
Move the stick slowly in the horizontal and vertical directions to figure out which one is which axis. Then, select the "Low" or "High" section of those axes. Finally, choose which key you want to press on the right side, in the box next to "Press a key:". "High" is activated when you have moved the axis far enough in one direction, and "Low" is activated for the other direction. On my controller, Axis 2 is vertical, so I have Low set to W and High set to S. Axis 1 is horizontal, so I have Low set to A and High set to D. "High" and "Low" are binary: when the axis (stick) is moved far enough, that action will activate (button will be pressed). Ignore the Analog sections.
Right analog stick
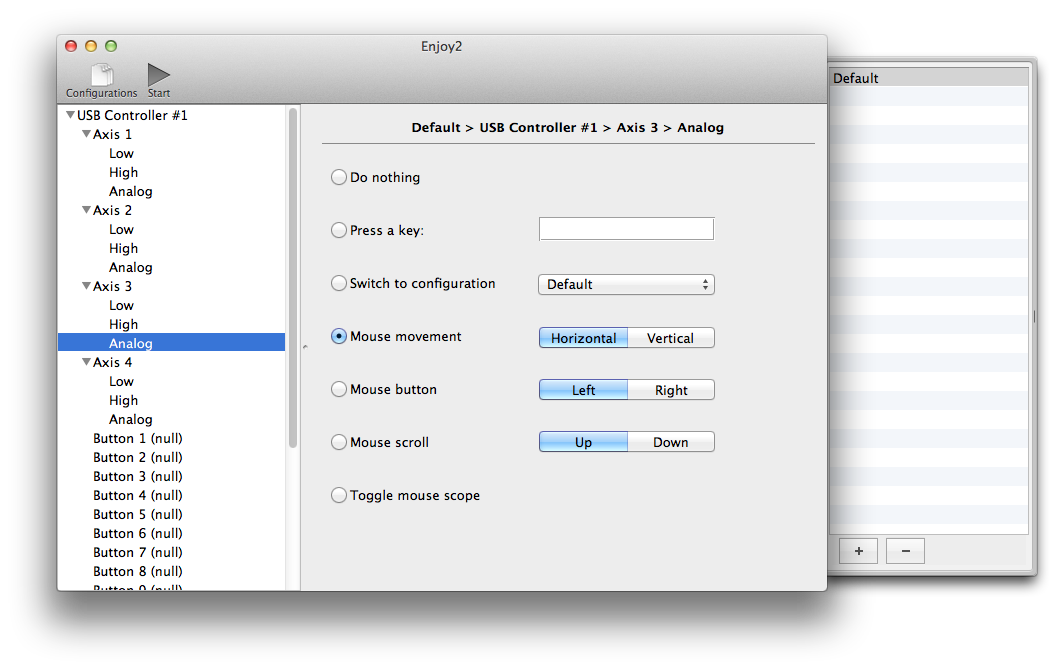
Let's do the right analog stick now. Do the same trick as above to figure out which axes correspond to the right stick--if there are only 4 axes in total, probably the two which you didn't map in the previous section. For these, since we want to have smooth camera control, we'll select the "Analog" settings on the left. Selecting "Analog" only works for mouse control, and means that if you move the axis a little bit off-center, the mouse moves slowly, and if you move the axis all the way to the edge, the mouse moves quickly. For me, Axis 3 is horizontal and Axis 4 is vertical. That means I've selected Axis 3 / Analog, and on the right side, selected Mouse movement: Horizontal. Similarly, I have mapped Axis 4 / Analog to Mouse movement: Vertical. Since we want analog movement, don't do anything with the High/Low settings on these axes. This will allow you to control the camera smoothly with the right stick, similarly to a console shooter. My Axis 3 setting looks like this:
Buttons
Finally, we'll map the rest of the buttons. These are pretty easy: just press that button on your controller, and the corresponding "Button N" setting is selected. Then, as above, you simply select what you want to happen when that button is pressed. The "Toggle mouse scope" action deserves special mention, because it's quite relevant to Minecraft: Minecraft has, essentially, two mouse "modes". One is the mode where you don't have a cursor, and moving the mouse moves the camera. The other is the mode where you have the inventory or a chest or a menu open, and you can click on things with a cursor. Because of the way input works on OSX, these two modes require completely different ways of simulating mouse input. The "Toggle mouse scope" action tells Enjoy2 to switch mouse modes. I use the right bumper ("R1" in PS3 terminology, I think) for this action. Every time you open the inventory (circle/B for me), you have to remember to toggle the mouse mode (press R1). Unfortunately, I haven't found a better way to handle this mouse mode issue, but if you have any ideas, I would certainly like to hear them.
Hope you found this short tutorial useful! You can also take a look at my JSON config file, although it may not be of use to you unless you have my exact controller. Here's the download link for Enjoy2 again. Have fun playing Minecraft with a controller!